Placing an Order
We have made the ordering process for WP Site Importer as simple as possible. The basic workflow is as follows:
Compare Product Editions -> Confirm Product Edition -> Add to Basket -> Proceed to Checkout -> Enter Payment Details
Choosing the right Product Edition
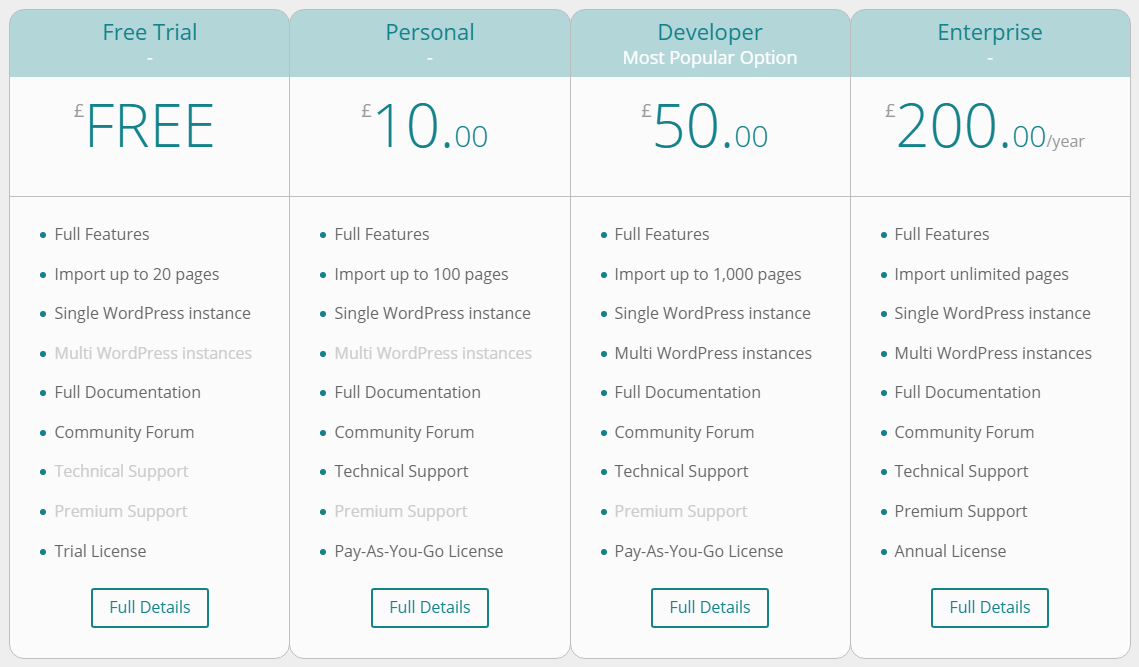
The easiest way to compare the product editions side-by-side is by using our Pricing page.
In order to proceed with a particular edition, click Buy Now.
Edition Comparisons with Pricing
(click image to zoom)
Confirm Product Selection
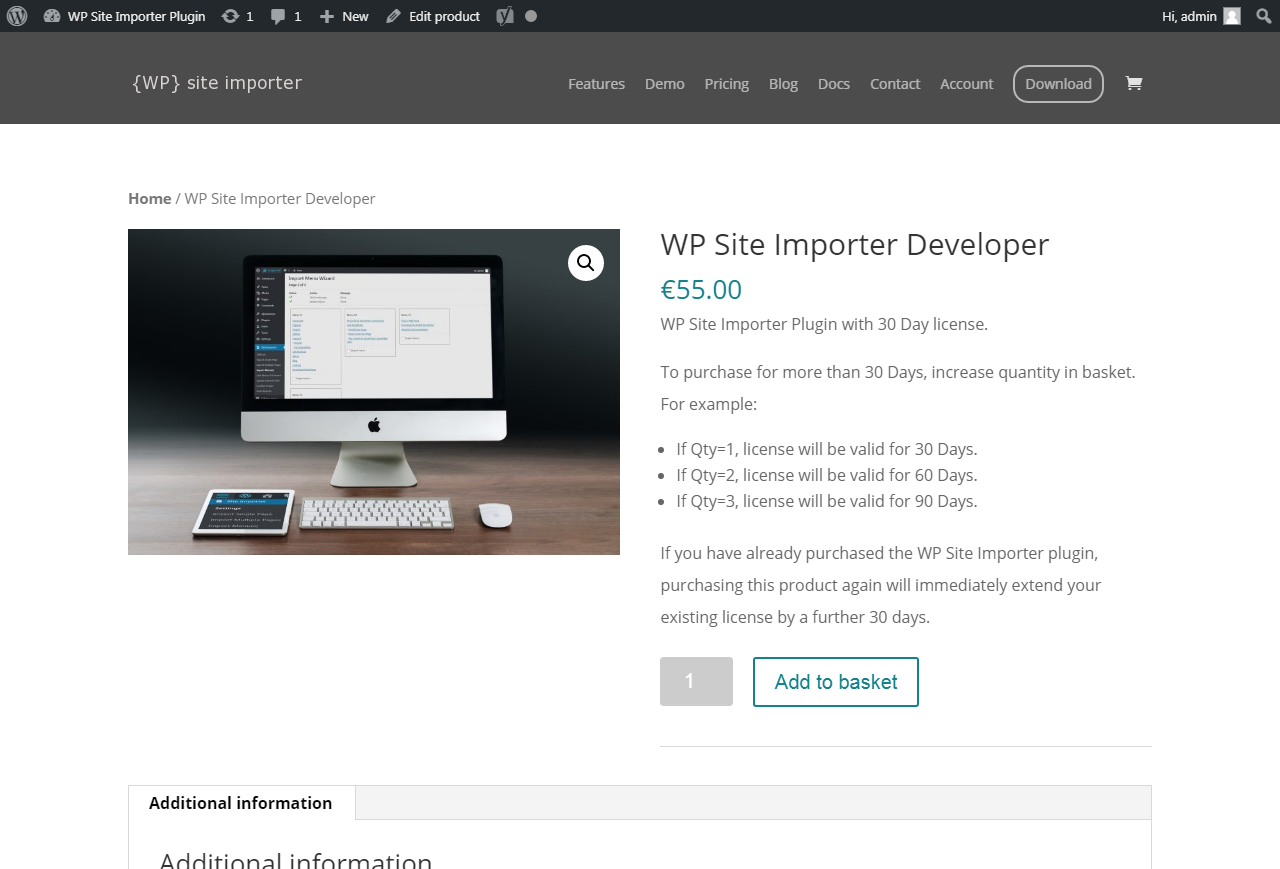
Further details about the Product will be displayed. Confirm that this is indeed the product your require by:
- Ensuring the Quantity is correct (see below)
- Clicking Add to basket
To ensure you have full flexibility over how long you wish to purchase the product for, you can amend the quantity. For example, if purchasing a 30 day license, changing the quantity to 2, will provide you with a 60 day license.
Adding a Product to the Basket
(click image to zoom)
Review Basket
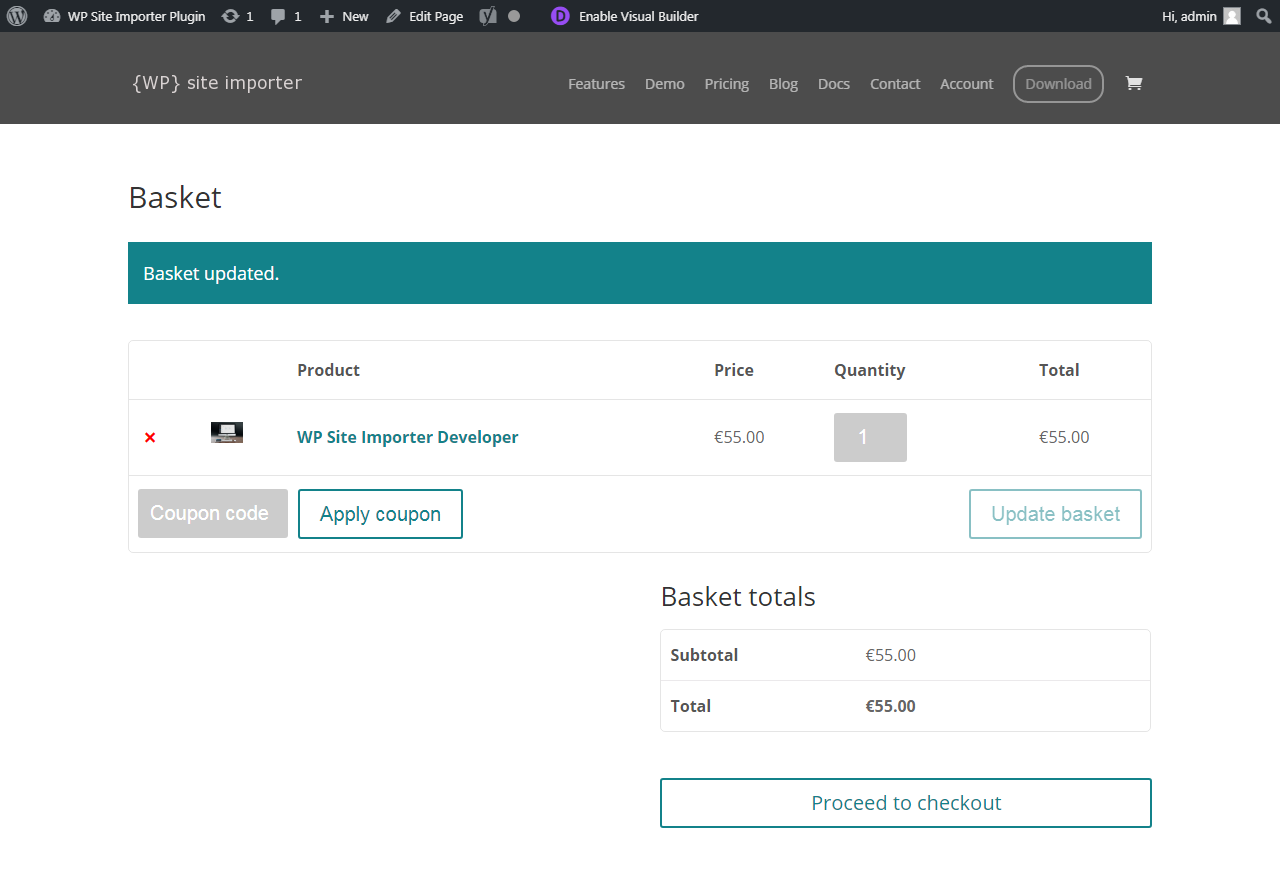
Your basket will be displayed, showing a summary of the item(s) added.
Optionally, apply any coupon codes and then click Proceed to checkout.
Reviewing the Basket
(click image to zoom)
Checkout
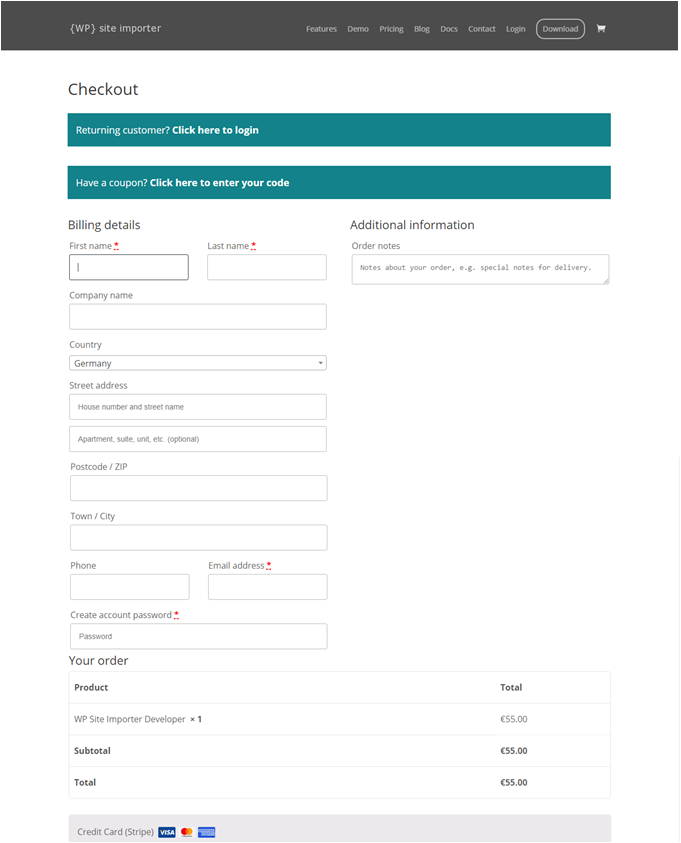
A summary of your order will be shown.
If you are a returning customer, you can log in at this point and much of the checkout page will then be automatically populated.
If you are a new customer, complete the of the required details, including your email address and password.
Your email address and password will be used to create your Customer Account.
Finally, click Continue to payment
The Checkout Page
(click image to zoom)
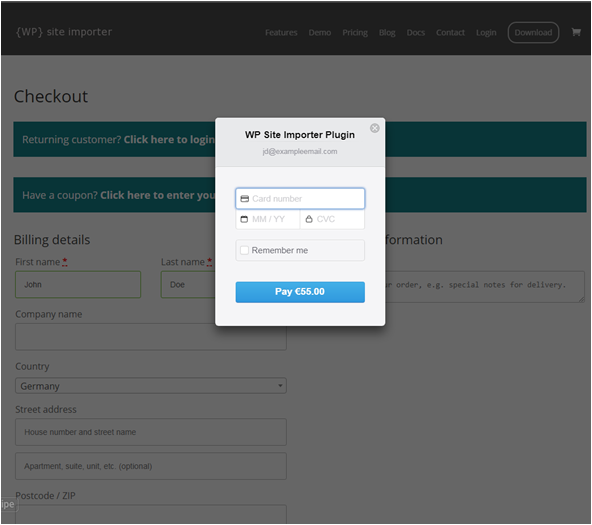
Entering Payment Details
A popup will appear, requesting your Credit Card number, expiry date and CVC (Card Verification Code, the last 3 digits on the reverse of the card).
Enter this information and your details will be securely submitted to our payment processor Stripe.
Once Stripe confirms that your payment has been approved, we will immediately confirm and process your order.
Capturing Payment Details
(click image to zoom)
