Importing Menus
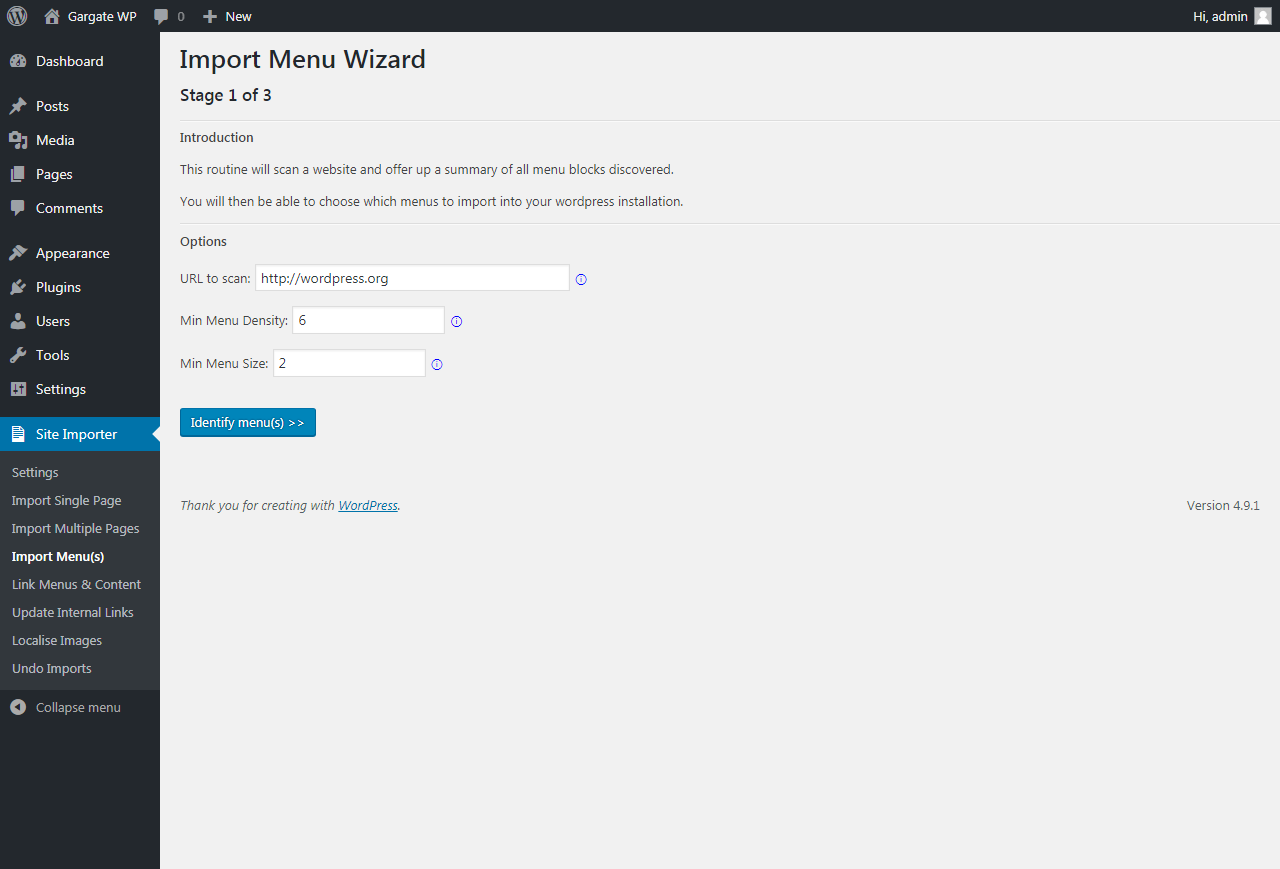
Step 1 of 3
Creating multi-level menus in WordPress isn’t hard – but it is tedious. The Import Menus feature examines the website at a given URL and automatically identifies all of the menus on the page. It will then provide the opportunity to automatically import, recreating the exact same structure in WordPress for you.
There are a few configuration parameters to condsider at step 1.
- URL to Scan
- Min Menu Desity
- Min Menu Size
URL to Scan
Enter a webiste address, including the leading http:// or https://
The tool will retrieve the web page found at this URL It will then automatically identify all of the menus within it.
Min Menu Density
The WP Site Importer for WordPress plugin uses a level of artificial intelligence to pick out areas of a page that “look like” menus.
Of course, menus vary enormously between different websites and differ in how they are constructed. It is particularly challenging to distinguish between a proper menu and a plain list of links.
This setting helps fine tune the identification routine. If a single menu looks like it is being split into multiple menus, try lowering this setting by a point or two. If multiple menus are being erroneously merged into one, try raising this setting by a point or two.
Min Menu Size
This setting is used to reject small sets of links that may get picked up as a menu but, in fact, aren’t. For example, a collection of two or three social link icons may get idetified as a menu. Raising this setting by a few points helps reduce false positives but risks excluding real menus if set to high.
Once you are happy with the settings, click Next to identify menus on the site which are available for automatic import into WordPress.
Import Menus – Step 1
(click image to zoom)
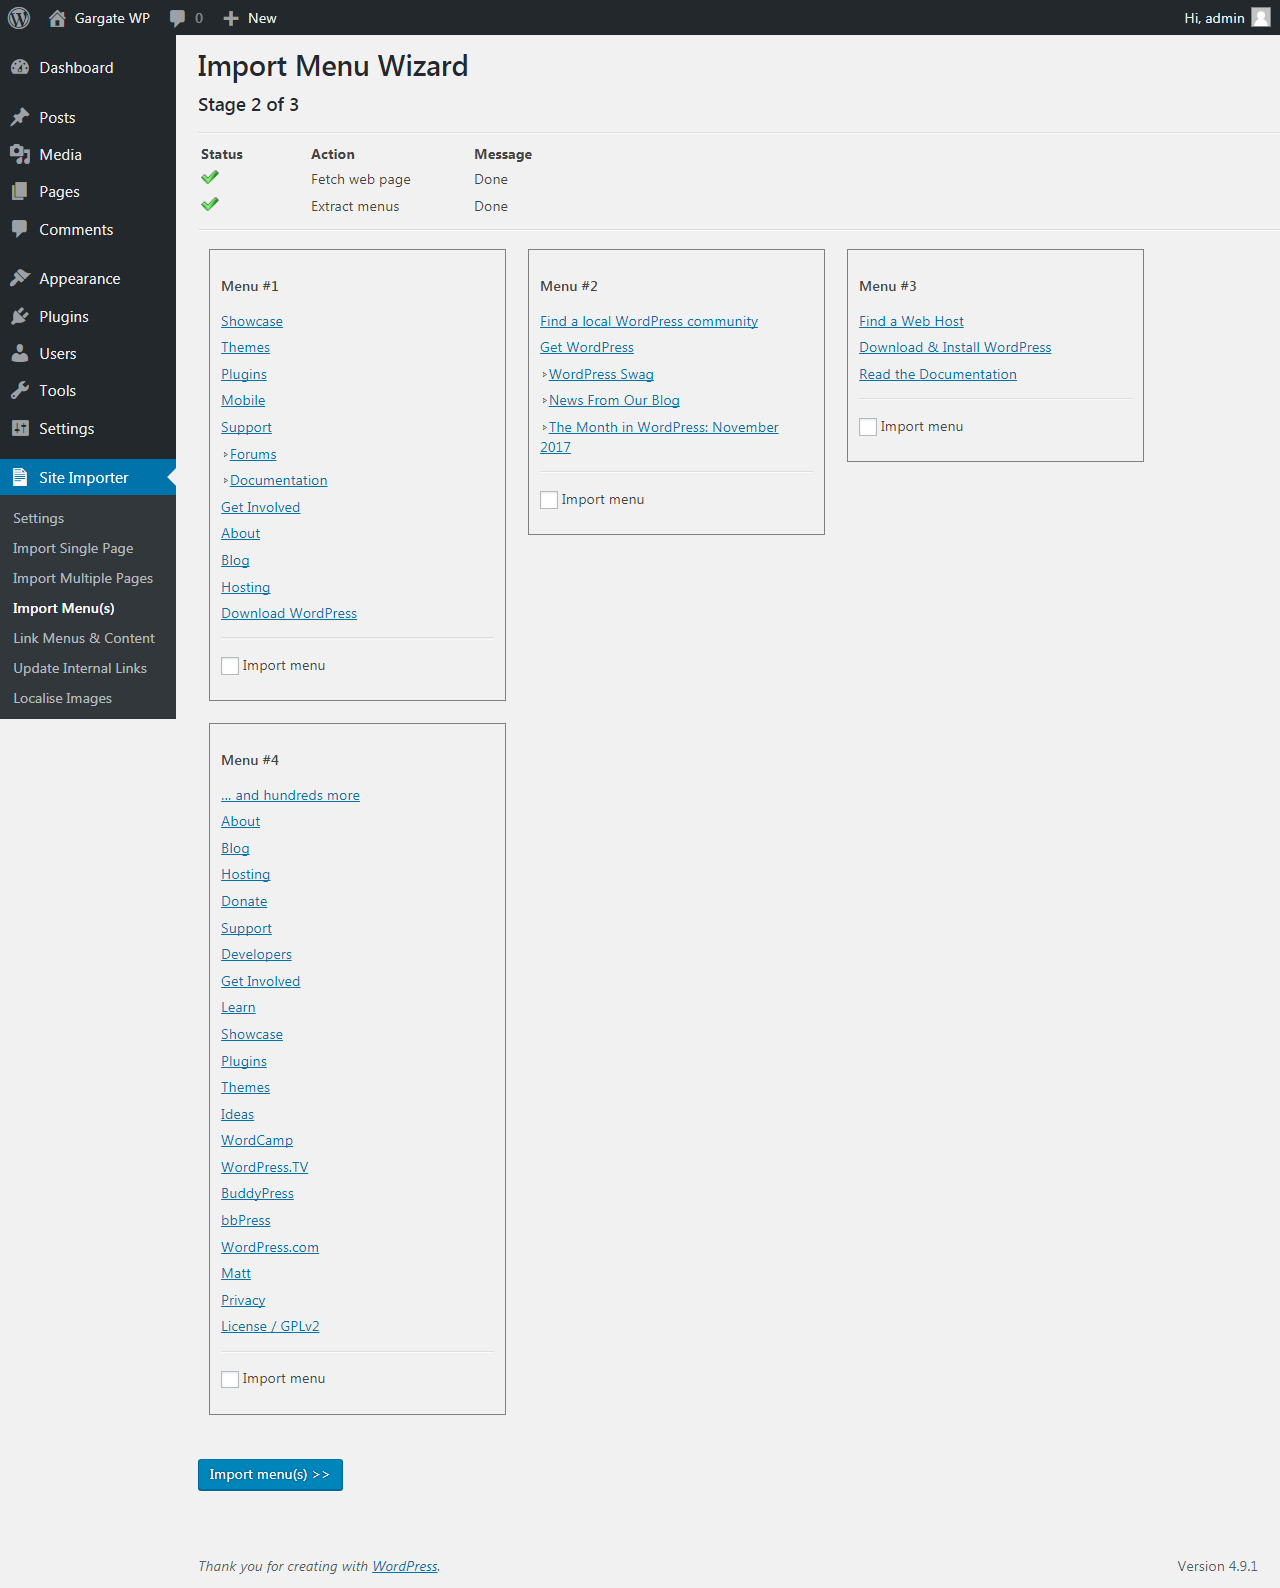
Step 2 of 3
After exploring the URL you provide, the WP Site Importer plugin will display a summary of all of the menus it discovers.
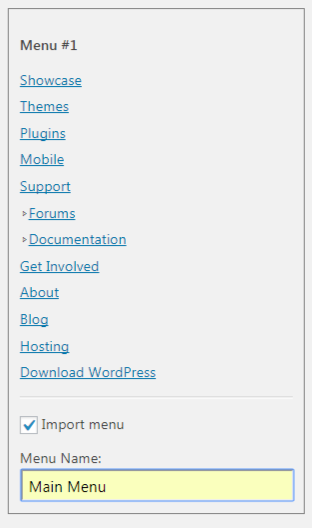
As you tick each of the menus that you wish to automatically migrate to WordPress, you will be prompted to provide a unique name for each.
Once you’ve selcted the menus to import, and provided them with a name, click Next.
Import Menus – Step 2
(click image to zoom)
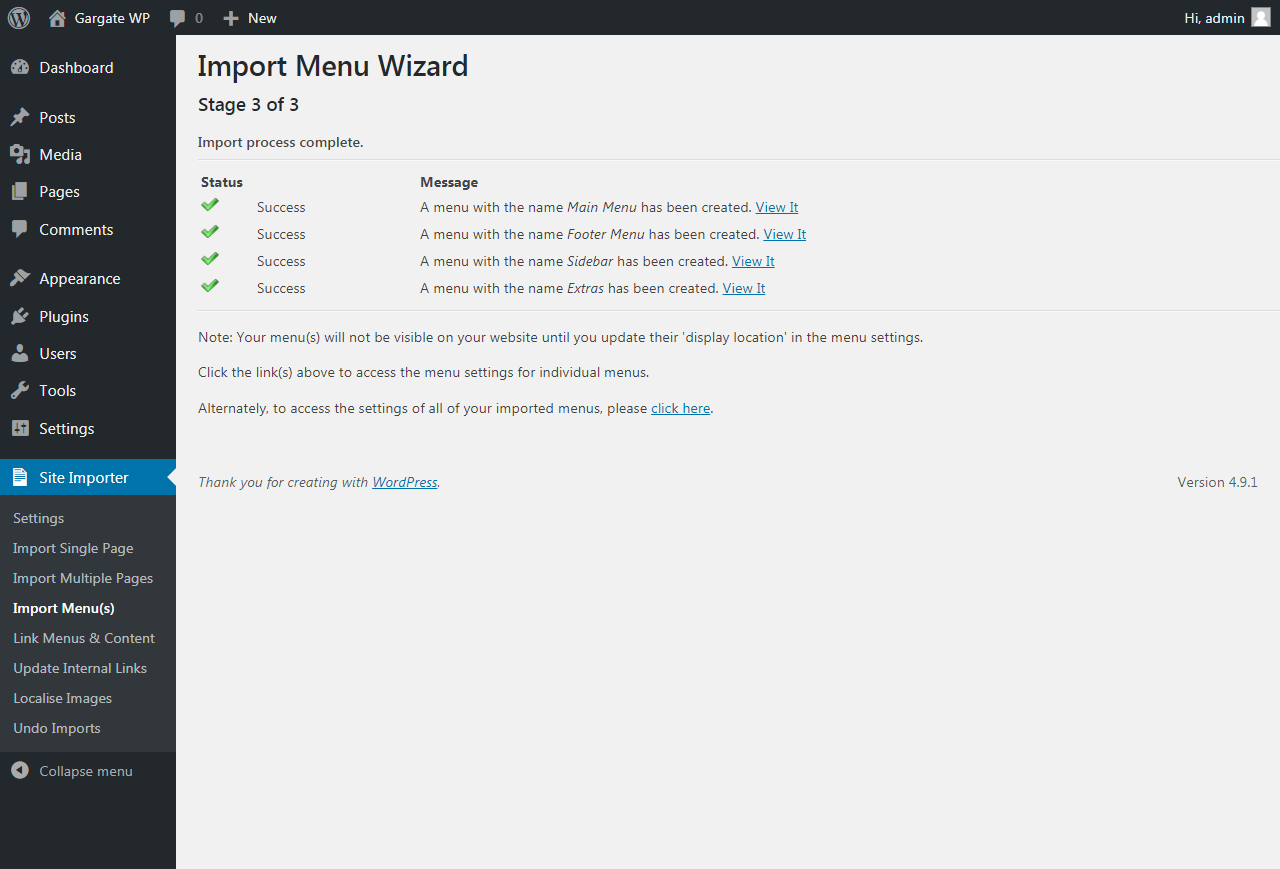
Step 3 of 3
Once the WP Site Importer plugin imports the menu(s) into WordPress for you, it will display a confirmation screen. This includes links for you to view each menu.
At this stage, it is important to note that the menus are not yet set to appear at any particular location within your WordPress theme.
Import Menus Step 3
(click image to zoom)
Placing the Menu within your Theme
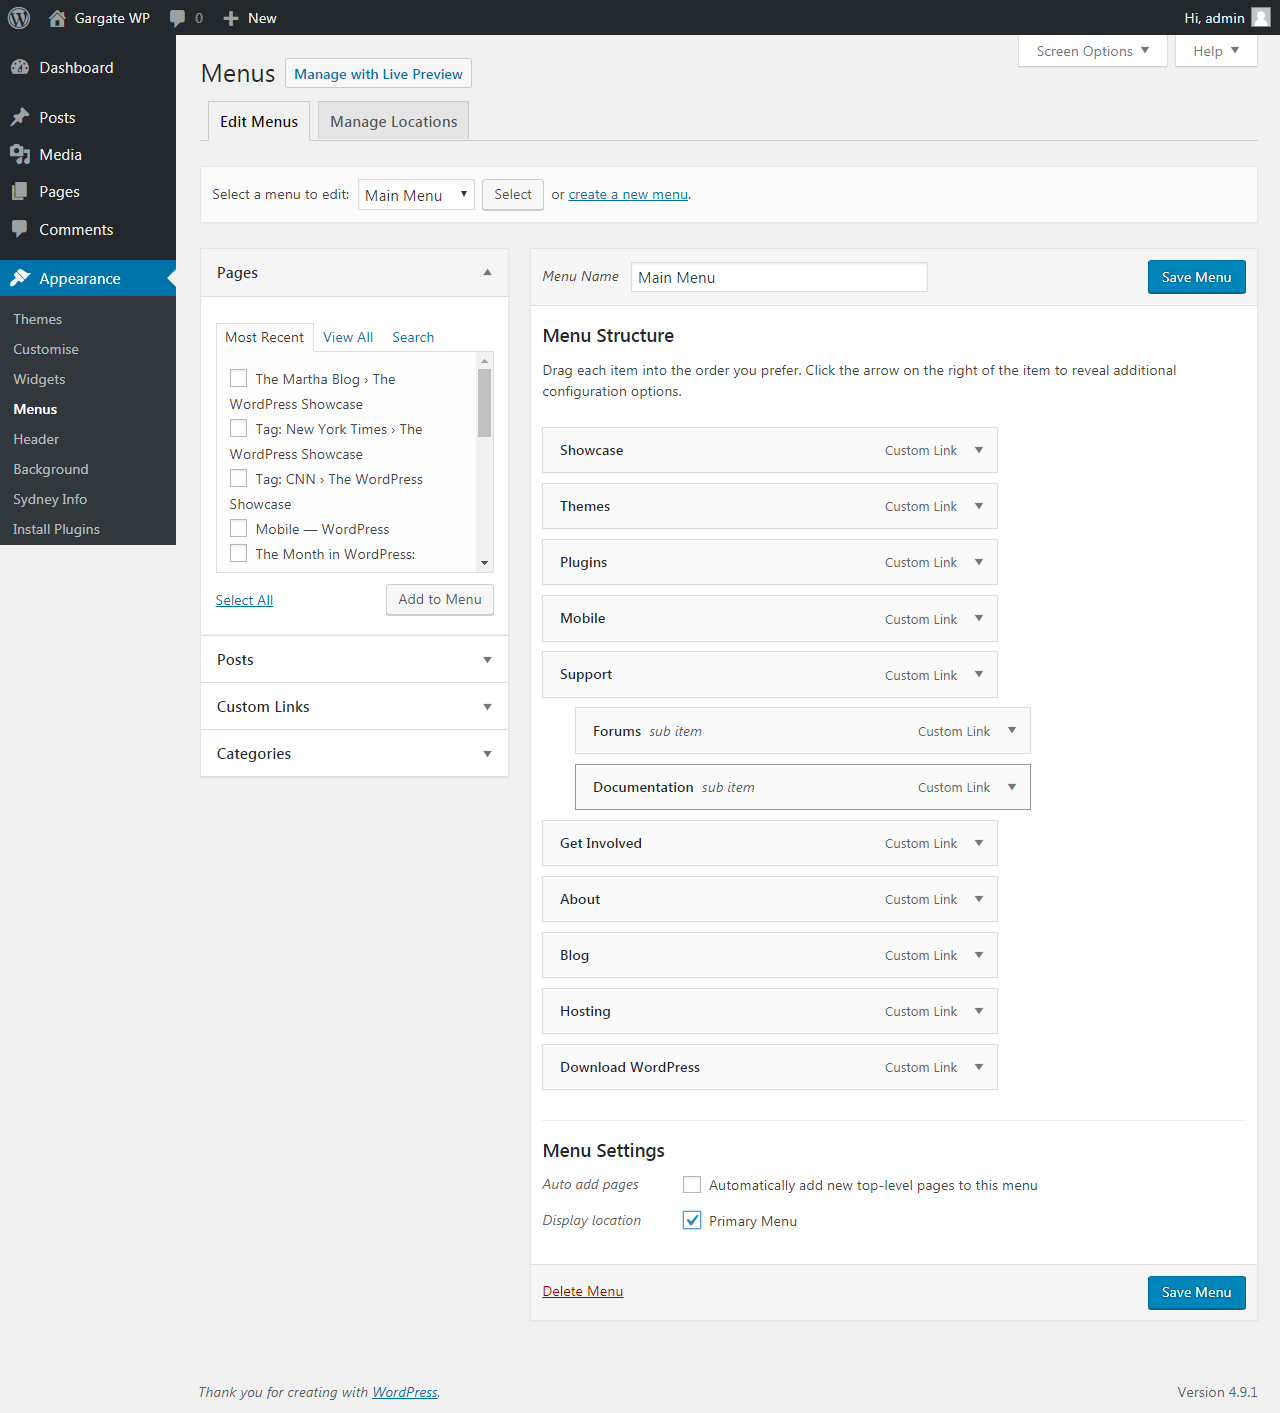
In order to place your menu at a location within your WordPress theme either follow the links from the summary page to view each menu, or access menus through the normal WordPress Appearance->Menus option.
Note that the generated menu may contain some indenting. This is normal if you have imported a multi-level menu.
Locate the Menu Settings section at the bottom of the menu structure. Tick the appropriate location (such as Primary Menu). Finally click Save Menu.
Diffrent themes provide a different number of locations and may label them with different terms, so your screen may look slightly different to the screenshot here.
Note that at this stage, the menu is made up of “Custom Links” which will still point to the original pages on the original website. These will be switched to normal Page/Post links and re-pointed to the imported content within your WordPress site when you run the Link Menus to Content feature.
Import Menus – Final Actions
(click image to zoom)
a couple of corrections in your spelling:
condside should be consider?
Enter a webiste address, including the leading https:// or https://
should read http:// on one of these.
Plus webiste should be website
Looks like a promising plug-in, thanks.
Thanks for pointing out the typos. I’ve corrected them now.
Widget Importer Exporter can create an export file (in JSON format with .wie extension) out of currently active widgets. This file can be imported into other sites using this plugin or used to restore widgets to the same site later.